Heat treatment is one of the important foundations for improving and ensuring the quality and reliability of mechanical products and improving the competitiveness of the manufacturing market. The level of the industry plays an important role in the development of the manufacturing industry. At present, except for a few manufacturers, the overall level of China's heat treatment industry is far from being able to adapt to the more fierce market competition environment faced by the heat treatment industry after joining the WTO. Among them, China's heat treatment testing equipment is even more backward. Severe restrictions and hinder the development of process technology and instability of product quality, and more importantly, can not effectively prevent products from having unnecessary quality accidents. Below I will give an example of the most commonly used hardness test after mechanical parts and tooling heat treatment.
Hardness is an indicator of the hardness of a metal material. The hardness value is not actually a unit of physical quantity. It is a comprehensive performance that characterizes a combination of different physical quantities such as elasticity, plasticity, deformation, strength, strength and toughness of the material. The index, generally speaking, refers to the ability of the metal to resist deformation and cracking in a small volume on the surface of the metal. The practical value of the hardness test using the portable Leeb hardness tester is that it is not necessary to damage the workpiece and can inspect the parts in batches. It has become one of the important experimental methods for product quality inspection, rational process development and analysis of product quality.
I have been working at the heat treatment production site. According to the usage and usage of the Leeb hardness tester, I think the Leeb hardness tester is a test method for the combination of press-in and rebound hardness values. It has its unique structure. It is also widely used, especially for testing the hardness value and failure analysis of large and medium-sized workpieces and complex shapes, and has the irreplaceable advantages of other types of hardness testers.
Structural parts and mold inspection actual use
First, use the Leeb hardness tester to test the hardness to analyze and verify the large-toothed shaft, the inner ring gear pretreatment process and the carburizing and quenching process:
1, after the pretreatment process test

The quality of this process directly affects the uniformity of the hardness distribution of the carburizing layer and the inner ring gear carburizing layer after the carburizing process operation, and the deformation of the tooth portion. More important is the strength of the core (unpermeable layer). When using the Leeb hardness tester to test the tooth portion and the shank of the pinion, the inner diameter and the end surface of the inner ring of the ring gear, if the difference between the highest and lowest hardness of the same area of ​​the test is found to be large, review the temperature of the instrument and the method of loading the furnace. Under the premise that the process cooling method is normal, it is possible to infer that there is segregation or band structure in the microstructure of the workpiece according to the difference of the hardness value and the distribution. Such as the metallographic picture shows the band segregation

Because the test by the hardness method is that the test point is high in the pearlite band of the black, and the hardness of the white ferrite band is low. This tissue defect is not likely to be eliminated in subsequent carburizing and quenching process operations, but is retained. Once the large pinion and the inner ring gear have such a structural defect, not only the short service life is caused when the machine is installed, but also a major equipment accident is often caused. When we can infer that there is such banding segregation in the forging by the hardness test method, the solution can be eliminated by the solution treatment process or other processes for eliminating the band segregation, thereby preventing equipment accidents and reducing losses.
2, after carburizing process test

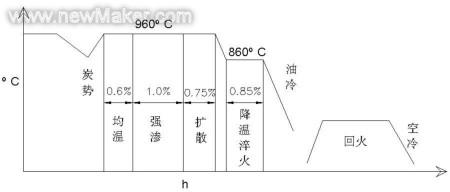
The final heat treatment process of the process shaft and the inner ring gear, usually the inspector only tests the HRC hardness of the sample, as shown in the figure:

Next page
High Mast Lights,High Mast Lights Pole,High Mast Light
China Searun Solar Solution Co., Ltd. , https://www.srsolarlights.com