With the end mill machining the workpiece on the CNC machine, it can be clearly seen that the tool center motion gauge does not coincide with the workpiece contour because the workpiece contour is formed by the end mill motion envelope. The center of the end mill is called the tool point of the tool (the 4th and 5th coordinate CNC machine is called the tool position vector), and the motion track of the tool point represents the movement track of the tool. In CNC machining, the program is programmed according to the workpiece contour size, or the program is programmed according to the motion track size of the tool point. This should be handled according to the specific situation.
CNC machine tool end mill processing
In the full-function CNC machine tool, the CNC system has a tool compensation function, which can be programmed according to the workpiece contour size. After the tool compensation is established and executed, the CNC system automatically calculates and the tool position is automatically adjusted to the tool movement track. The machining program is directly prepared by using the workpiece size, the tool is worn, and the replacement machining program is unchanged, so the use is simple and convenient.
The economical CNC machine tool has a simple structure and a low price, and has a certain amount of ownership in the production enterprise. In the economical CNC machine system, if there is no tool compensation function, the machining program can only be programmed according to the movement path size of the tool point. This requires that the tool path size be calculated according to the workpiece contour size and tool diameter. Therefore, the calculation amount is large and complicated, and the tool wear and replacement need to recalculate the track size of the tool point, and the machining program is re-programmed.
Second, the tool compensation in the full-function CNC machine system
1. CNC lathe tool compensation
CNC lathe tool compensation functions include tool position compensation and tool arc radius compensation. In the machining program, the T function is used to specify that the first two XXs in TXXXX are tool numbers, and the last two XX are tool compensation numbers, such as T0202. If the tool compensation number is 00, it means that the tool offset is canceled.
(1) Tool position compensation The tool position change caused by tool wear or re-installation of the tool. After the tool position compensation is established and executed, the machining program does not need to be re-programmed. The method is to measure the position of each tool and input it into the specified memory. After the program executes the tool compensation command, the actual position of the tool replaces the original position.
If there is no tool compensation, the tool moves from 0 to 1 point, and the corresponding block is N60G00C45X93T0200. If the tool compensation is X=+3, Z=+4, and stored in the corresponding compensation memory, after the tool compensation is executed, the tool will be 0 point moves to 2 points instead of 1 point, and the corresponding block is N60G00X45Z93T0202.
(2) Tool arc radius compensation When programming the CNC lathe machining program, the turning tool tip is regarded as a point (imaginary tool tip P point), but in fact, in order to improve the tool life and reduce the surface roughness of the workpiece, the car The tip of the knife is ground into a circular arc with a small radius (tool edge AB arc), as shown in Figure 3, which will inevitably result in a shape error of the machined workpiece. On the other hand, the position of the cutting edge arc, the shape of the turning tool will also affect the machining of the workpiece, and these can be solved by the tool radius compensation. The shape and position parameters of the turning tool are called the tool nose orientation, as shown in Figure 4, with parameters 0-9, and P point is the theoretical tool tip point.
(3) Tool compensation parameters Each tool compensation number corresponds to tool position compensation (X and Z values) and tool arc radius compensation (R and T values). There are 4 parameters, which are input to the corresponding memory before machining, and displayed on the CRT. As shown in Figure 5. During the automatic execution process, the numerical control system automatically corrects the position error of the tool and automatically performs the tool nose radius compensation according to the values ​​of X, Z, R, and T in the memory.
2. Machining center, CNC milling machine tool compensation
The machining center and the numerical control system of the CNC milling machine, the tool compensation function includes tool compensation functions such as tool radius compensation, angle compensation and length compensation.
Next page
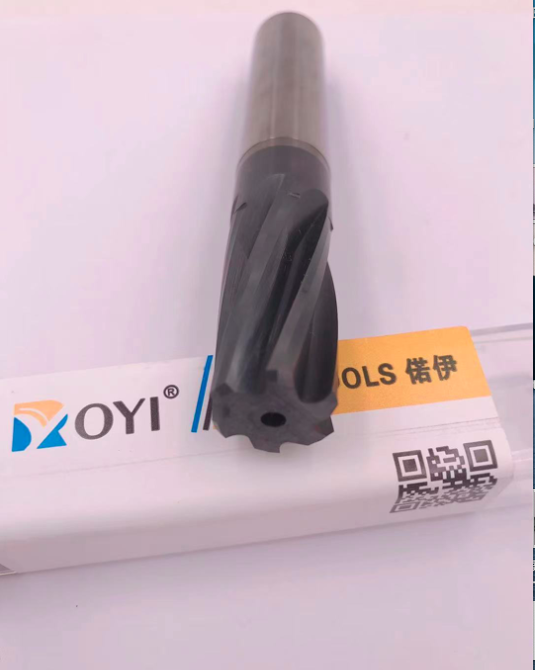
Carbide reamers has more than one cutting flutes, usually have the 6 cutting flutes, Used for reaming or trimming, it has straight flutes and spiral flutes, Belonging to one of finishing tools.
Reaming is a cutting method that is easy to operate, high productivity, and can obtain high-quality holes, so it is widely used in production.

Reamer Solid Carbide,Reamer Machining,Solid Carbide Drills,Solid Carbide Cutters
ROYI CNC TOOL TAIXING CITY CO.,LTD , https://www.royitools.com