The general troubleshooting and circuit diagram of the cash register:
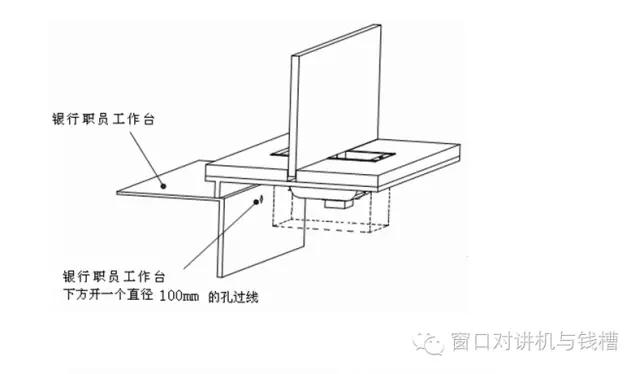
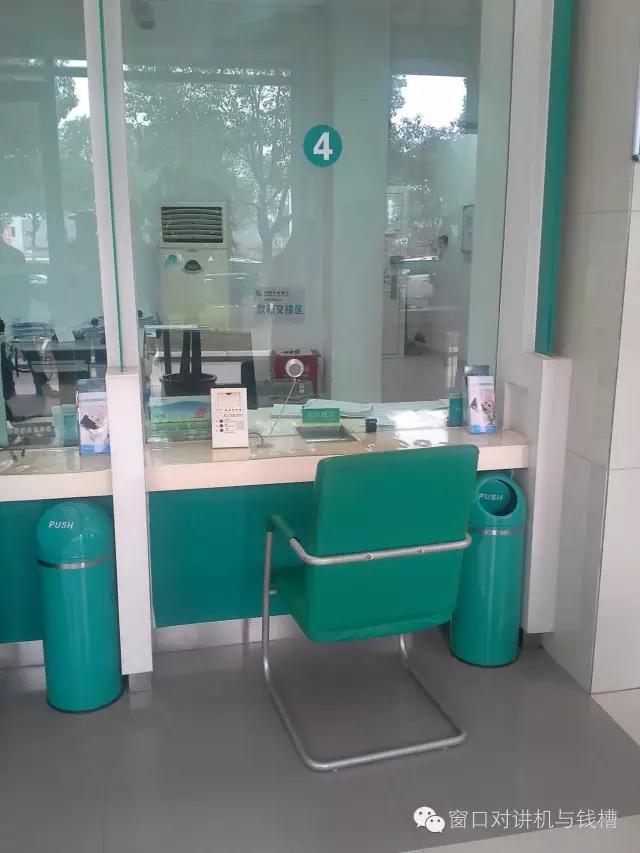
1. On the side of the bank staff desk directly facing the channel groove, please reserve a host communication cable with a diameter of 100mm and a wire-through hole for intercom connection according to the position shown in the figure
2. Connect:
1 Connection diagram:
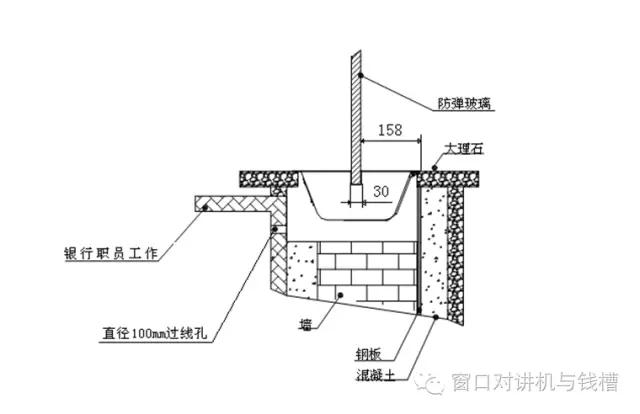
Pass the host communication cable and intercom connection through the reserved hole with a diameter of 100mm into the reserved space of the channel slot; connect according to the selected connection scheme.

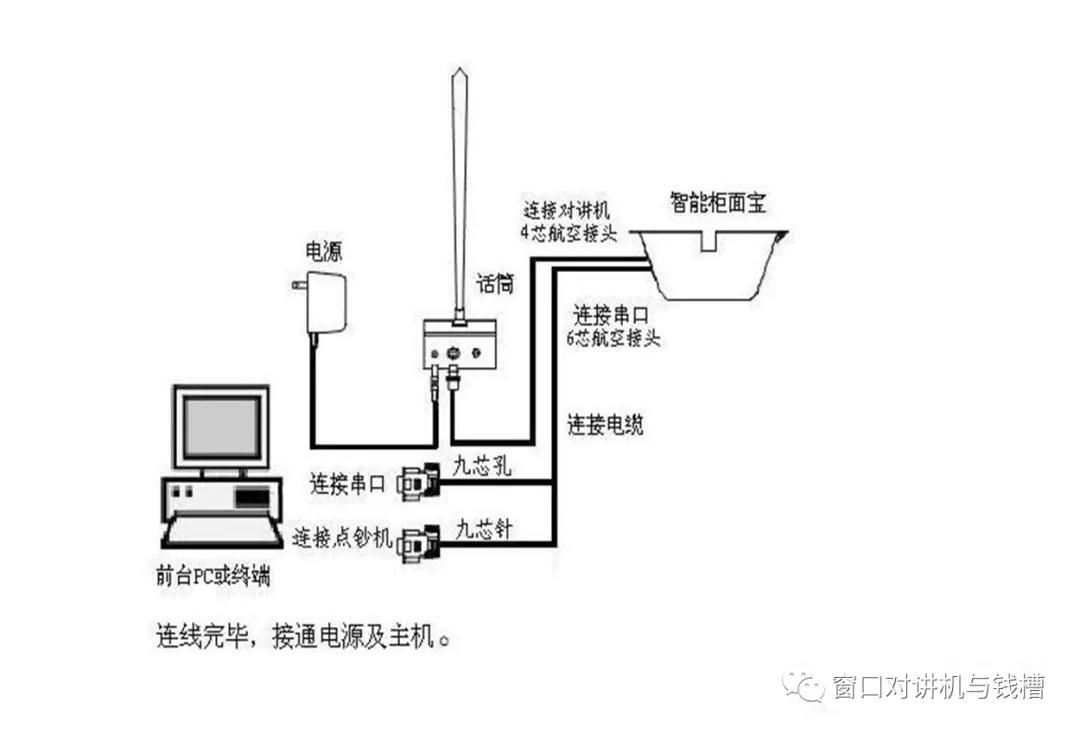
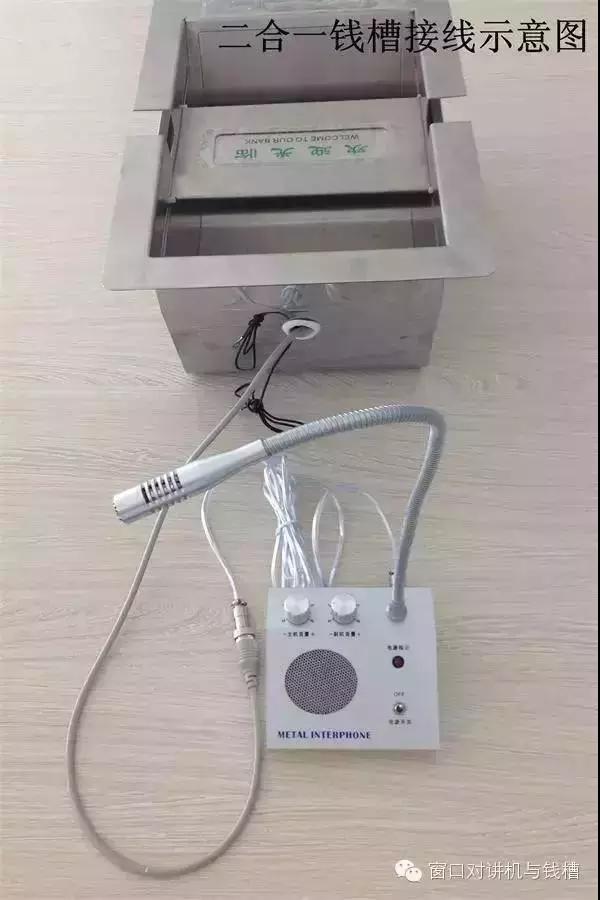
2. The whole picture of the connection line of the intelligent cash register:
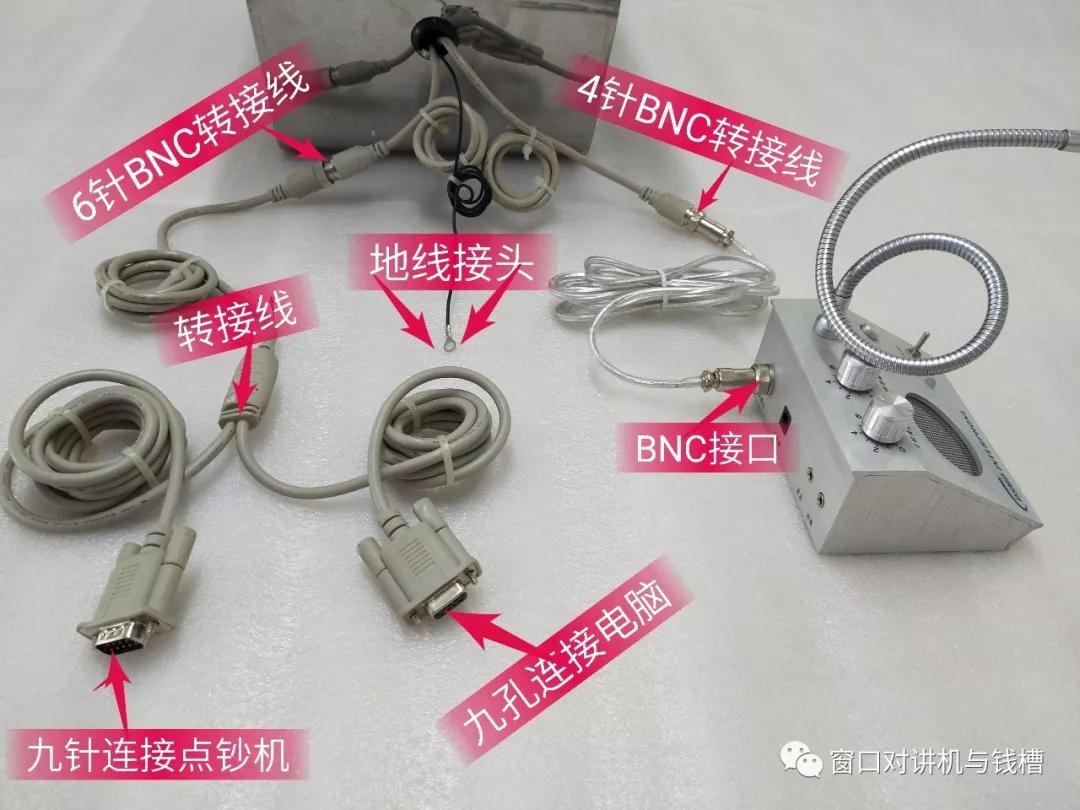
There are three wires pulled out at the teller end of the money slot: a 4-pin cable connects to the window intercom, a 6-pin cable separates into two cables; a 9-hole cable connects to the teller computer (PC terminal) and a 9-pin cable connects to the cash register , The thin black wire is used to connect the bank ground wire (Note: the black ground wire must be connected to prevent the intercom from howling)
Solution to general failure of window intercom
1. Silent
1. Whether the 220V power supply is plugged in, the power supply should be plugged in.
2. The auxiliary machine plug or DC power plug is loose, please plug it in tightly.
3. Whether the volume knob is not turned up, the knob can be adjusted.

1. The sound insulation performance of the installation environment is too poor, the distance between the main machine and the auxiliary machine should be further increased.
2. The environmental noise is large, and the volume knob is adjusted appropriately.
3. For example: Prototype testing should be separated by a certain distance; this kind of environmental noise insulation is not as closed as the counter. Please take it to the sales counter to test it. The volume adjustment knob is adjusted to the 4 position. The volume effect will be better.
3. The teller's voice is too low
1. The internal volume knob is too small and can be adjusted clockwise.
2. The customer is too far from the auxiliary machine, please come closer.
Fourth, the client listens too softly
1. The tubular microphone does not point to the teller, and should face the teller.
2. The external volume knob is too small and can be adjusted clockwise.
5. The sound is intermittent, even unable to transmit
1. The speaker is too far from the microphone, and should be closer to the microphone (less than 1250px is ideal).
2. When one party is talking, the other party's conversation will be suppressed.
3. The environmental noise is too strong, you can turn down the volume knob of the corresponding channel, or ask the speaker to get closer to the microphone.
Six, two in one cash register slot (slot body + window intercom) Intercom troubleshooting method
1. Silent 1. Whether the 220V power supply is plugged in, the power supply should be plugged in.
2. The auxiliary machine plug or DC power plug is loose, please plug it in tightly.
3. Whether the volume knob is not turned up, the knob can be adjusted.
4. In order to prevent the intercom host and auxiliary unit from falling off, the BNC interface can be tightened. 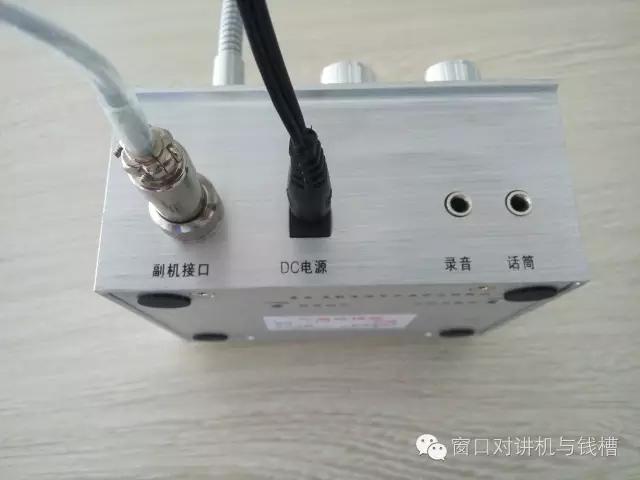
6. There is no sound or low sound in the cash register speaker and microphone:
No sound: Check whether the power cable and the window intercom are well connected. If there is a loose connection, tighten the BNC interface.
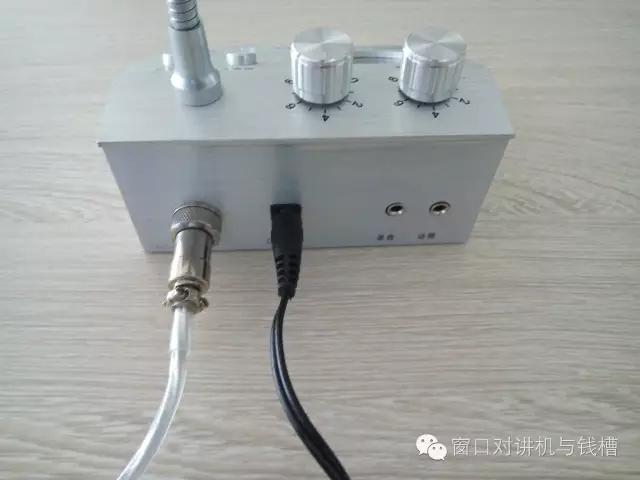
Low sound: check the volume knob of the main unit of the intercom in the window and the knob of the sub unit, adjust the knob to the appropriate position, or adjust to the ideal sound quality according to the requirements of the working environment. If the sound transmitted by the speaker and microphone is relatively small, it may be that the speaker and microphone have fallen into dust after a long time. Let your cleaning staff use a rag to clean the filter of the microphone and speaker. You can also open the two screws of the motherboard for cleaning, remove the motherboard and use a rag and alcohol to clean the dust of the microphone and the speaker, so that the cleaning is more thorough. as the picture shows: 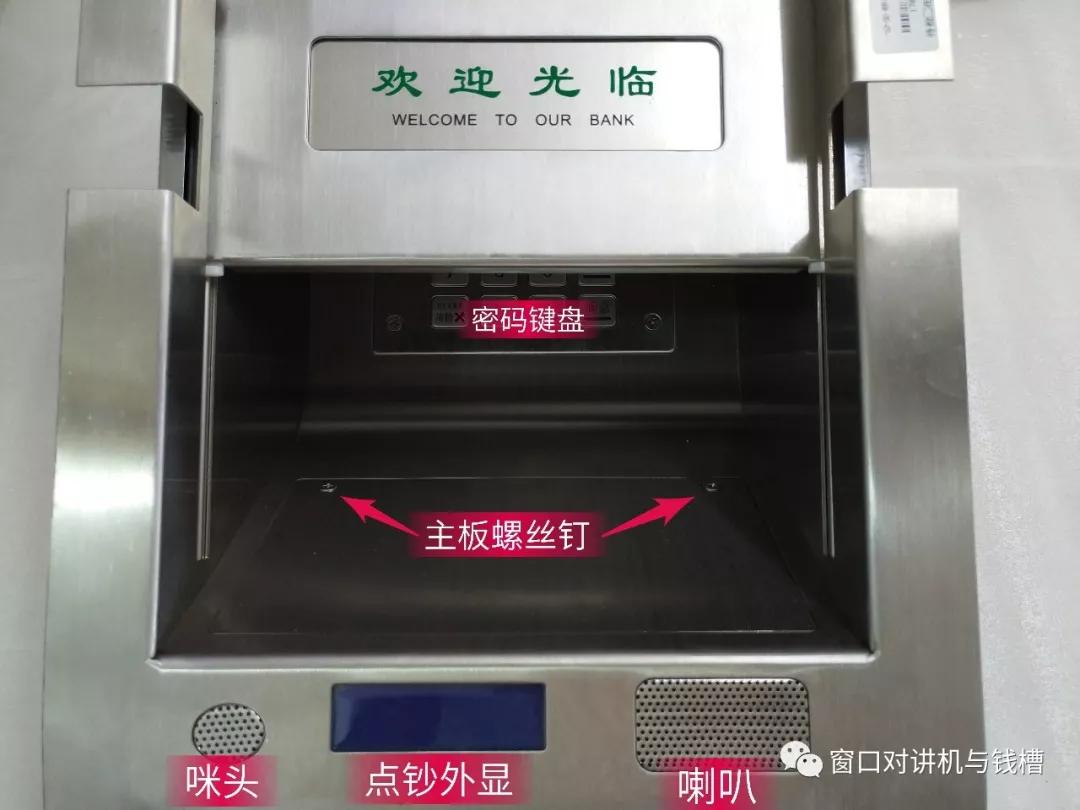
3. If there is no sound from the horn and microphone, please inform the after-sales department. The after-sales department will arrange the local after-sale service for you. Please wait.
Line connection of multi-function cash register and solutions to general faults:
1. The window intercom has no sound and low sound:
1. No sound: Check whether the power cable and the window intercom are well connected. If there is a loose connection, tighten the BNC interface.
2. Low sound: check the volume knob of the main unit of the intercom in the window and the knob of the sub unit, adjust the knob to the appropriate position, or adjust to the ideal sound quality according to the requirements of the working environment. If the sound transmitted by the speaker and microphone is relatively small, it may be that the speaker and microphone have fallen into dust after a long time. Let your cleaning staff clean the filter of the microphone and speaker with a rag. You can also open the two screws of the motherboard for cleaning, remove the motherboard and use a rag and alcohol to clean the dust of the microphone and the speaker, so that the cleaning is more thorough. As shown in the figure: 2. Schematic diagram and operating specifications of the multi-functional cashier cabinet teller line connection: 2. Schematic diagram and operating specifications of the multi-functional cashier cabinet teller line: 
Second, the schematic diagram and operating specifications of the multi-functional cash register slot teller terminal connection:
There are three wires pulled out at the teller end of the money slot: a 4-pin cable connects to the window intercom, a 6-pin cable separates into two cables; a 9-hole cable connects to the teller computer (PC terminal) and a 9-pin cable connects to the cash register , The thin black wire is used to connect the bank ground wire (Note: the black ground wire must be connected to prevent the intercom from howling)
All the lines are connected, and they can work normally after being powered on.
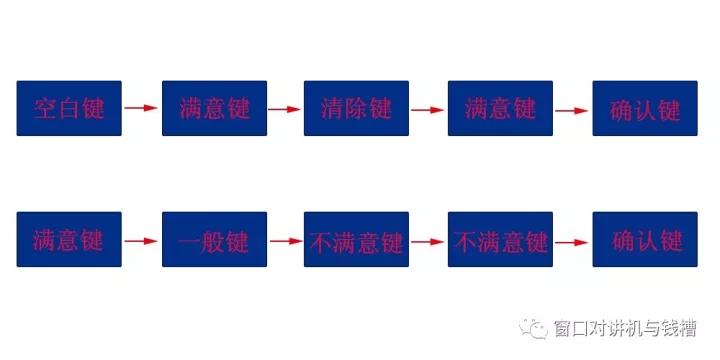
3. Multifunctional cash register password keyboard debugging and instructions:
1. Check the line connection and whether the power supply is normally energized. The number keys will be illuminated when the power is normally energized.
2. The keyboard is not lit, indicating that the connection line is not well connected. Pull out three wires at the teller end: 4-pin connecting wire connects to the window intercom, and 6 pins are divided into two connecting wires; 9-hole connecting wire connects to the teller computer (PC terminal) 9 pins The connection line is connected to the cash register. The thin black wire is used to connect the bank ground wire (Note: The black ground wire must be connected to prevent the intercom from howling)
3. After all the lines are connected, the luminous keyboard can work normally! as the picture shows:
There are three wires pulled out at the teller end of the money slot: a 4-pin cable connects to the window intercom, and a 6-pin cable separates into two cables; a 9-hole cable connects to the teller computer (PC terminal) and a 9-pin cable connects to the cash register , The thin black wire is used to connect the bank ground wire (Note: the black ground wire must be connected to prevent the intercom from howling)
All the lines are connected, and they can work normally after being powered on.
3. Multifunctional cash register password keyboard debugging and instructions:
1. Check the line connection and whether the power supply is normally energized. The number keys will be illuminated when the power is normally energized.
2. The keyboard is not lit, indicating that the connection line is not well connected. Pull out three wires at the teller end: 4-pin connecting wire connects to the window intercom, and 6 pins are divided into two connecting wires; 9-hole connecting wire connects to 9 pins of the teller computer (PC terminal) The connection line is connected to the cash register. The thin black wire is used to connect the bank ground wire (Note: The black ground wire must be connected to prevent the intercom from howling)
3. After all the lines are connected, the luminous keyboard can work normally! as the picture shows: 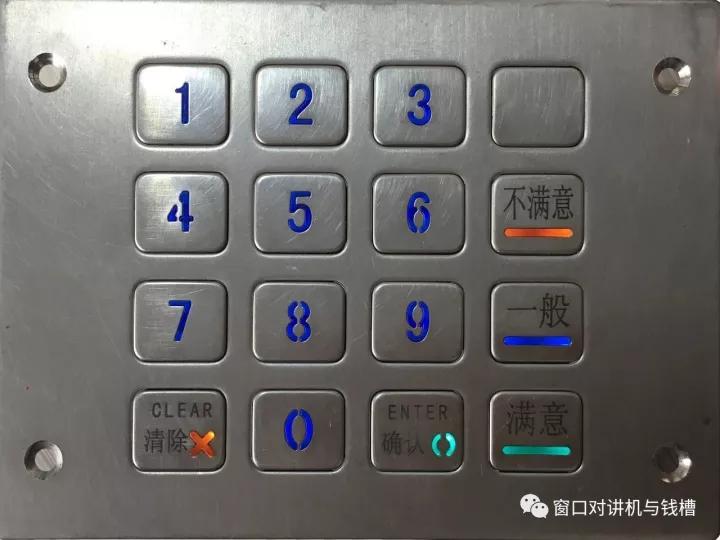


Horizontal Tensile Testing Machine
Tensile Testing Machine,Horizontal Tensile Testing Machine,Wire Tensile Testing Machine,Steel Wire Tensile Testing Machine
Jinan Chenda Testing Machine Manufacturing Co., Ltd. , https://www.jncdtester.com