What is the lock floor?
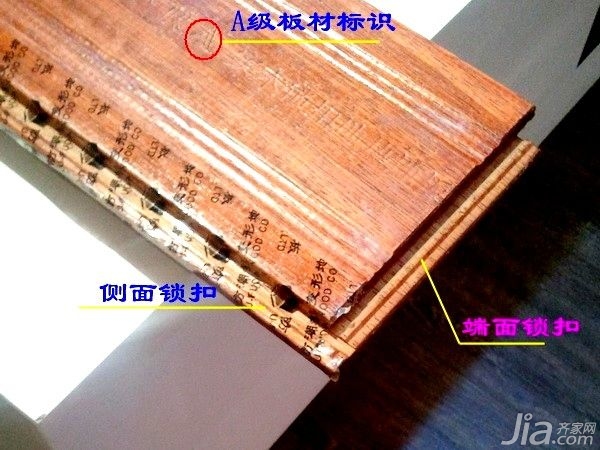
Locking floor (also known as buckle) is a patented technology (Patent No.8) of Shandong Dingyixuan Floor. This type of buckle closely combines and completely overcomes the cracks generated in the floor due to the change of temperature, humidity and humidity. Warping drums and other issues, in the paving process, completely free of nails, glue, free keel, directly laid on the ground, saving room height, and can be repeated dismantling and utilization, economical and practical than the conventional floor per square savings shop The loading costs about 20 yuan.

Locking Floor Buying Tips
Before buying the lock floor, you may wish to pay attention to the following two precautions:
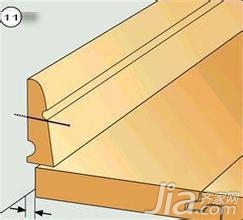
First, the type of lock floor. The laminate flooring sold in the market can be divided into single locks, triple locks and four-fold lock floors. The most important feature of the lock floor is to prevent cracks in the floor seams. The firmness, stability and long-lasting of the floor lock are mainly determined by the chamfering area and angle of the lock, and the processing accuracy, substrate toughness and other factors. As long as the structure of the single lock is reasonable, it is enough to prevent cracks in the floor seams. Multiple locks may not achieve ideal targets in chamfering areas and angles, and such results may be counter-productive. The buckled floor developed based on geometry and mechanics is improved on the basis of the existing multiple floor locking styles. The floor is tightly jointed, fastened, and not easily tripped.
Second, pay attention to the size of the lock floor manufacturer. Locking floors have higher requirements for production equipment, processing technology, and substrate properties. Generally small plants cannot produce. Therefore, you should pay more attention to your purchase and be careful not to be deceived by counterfeit manufacturers.

Locking floor cleaning and maintenance
How to clean and maintain the lock floor is reasonable? Consider the following three points:
First, hit the glue. The main purpose of the glue to be locked during floor installation is to prevent moisture. When glue is applied during installation, the joints can be sealed and used as a preventive measure to add a layer of insurance. In addition, the lock design deliberately provides glue chambers for the glue to flow and solidify in the floor, which can accurately lock the floor in the design position, reduce the possibility of joints becoming larger and the edges rising, and improve the appearance and service life of the floor.
Second, avoid moisture. To maintain the floor is sure to wipe the floor with a wet mop or a rag, the board is no problem, but the seam between the board and the board is very easy to enter the water, of course there is no correlation with the entrance of moisture, but our The floor is used for many years, and it is bound to affect the service life of the floor and bring losses to consumers.
Third, the construction process precautions. Start with the pavement from the corner. Place the side of the board with the tongue against the wall, leaving a 10mm gap between the wall and the short side of the board. Then align the next board with the short edge of the first board. Push the board forward firmly while pressing it on the ground. Use the same method to complete the first row of installations. The last floor should be cut to the proper length, leaving a 10mm gap between the walls. Start the next row of installations (greater than at least 300mm) by cutting the remaining boards. Then align the tongue edge of the first row of the new row with the groove in the front row to reach a certain angle. Push the board forward and lay it flat on the ground. Pair the short edge of the board with the board of the previous board and fold it down. Make sure the position of this board is integrated with the previous board. Raise the board slightly (with the previous board installed in the previous row, approximately 30mm) and press it into the front row and lower it. When the current three-row installation is completed, adjust the distance between the floor and the wall to 10mm. Continue the installation as described above until the end.
Flooring solid wood flooring laminate flooring
1. Correct selection of teeth
1) Before use, confirm whether the mechanical properties of the product meet the customer's requirements (such as the tensile strength of the Bolt and the safe load of the nut).
2) The length of the bolt should be selected properly, with 1-2 pitch exposed after tightening.
3) Before use, the thread should be kept clean.
2. How to use dental strips correctly
1) When tightening the teeth, pay attention to that the direction of force applied by the wrench should coincide with the axis of the screw, and do not tilt.
2) In the process of tightening, the force should not exceed the safety torque, and should be uniform. Try to use the torque wrench or socket.
3) Locking too fast will lead to locking, it is recommended not to use electric or pneumatic wrench.
4) Keep the thread clean. In order to ensure the smooth fit of screw and nut, it is recommended to put the product in a clean container and do not place it at will.
3. Standard of tooth bar maintenance
1) If there is slight damage to the removed tooth, screw and nut, the die and tap shall be used for repair.
2) The removed and repaired teeth, Screws and Nuts shall be maintained by means of oil bubble or lubricating oil, and shall be placed in order according to specifications, models and purposes.
4. Scrap standard
The bolts with obvious crack, broken thread, sliding, disorderly thread, screw tensile deformation, shear trace, etc. which can not be repaired by the on-site leader can be scrapped.
5. Specification parameters of tooth strips
Texture of material:
304/316
Product standard:
DIN975
Surface treatment:
turn into a good guy
Threaded Rods,Full Thread Rod Bolt,Hexagon Socketthread Rod Bolt,Stainless Steel Thread Rod Bolt
Suzhou Gubao Screws Co.,Ltd. , https://www.gbscrewes.com